> ## Documentation Index
> Fetch the complete documentation index at: https://seam-feat-mintlify-migration-iteration.mintlify.site/llms.txt
> Use this file to discover all available pages before exploring further.

# Mobile Key Quick Start

> Create your first mobile key credential to start controlling an access control system with Seam.

In this quick start, create a user identity for a virtual [Salto KS](/device-and-system-integration-guides/salto-ks-access-control-system) access control system. Then, grant the user access to an entrance using a mobile key credential. With mobile keys, developers can create mobile apps that download users' credentials and then use Bluetooth low energy (BLE) or similar communications technologies to unlock granted nearby entrances. For more information about Seam's mobile access solution, see [Mobile Access](/capability-guides/mobile-access/index).

<Info>
  This quick start walks you through the process that applies specifically to
  the Salto KS ACS. There are often differences between access control systems.
  Once you've completed this quick start, learn how to work with your ACS using
  Seam, by reading the [system integration
  guide](/device-and-system-integration-guides#access-control-systems)
  for your ACS.
</Info>

## Overview

This quick start walks you through the following basic steps:

1. [Connect](/core-concepts/workspaces/index#connecting-virtual-devices) an access control system to Seam.
   * To get started quickly, use a virtual ACS in a [sandbox workspace](/core-concepts/workspaces/index#sandbox-workspaces).
2. Install a Seam SDK and create an API key.
3. Create a [user identity](/api/user_identities/object).
   * Seam user identities enable you to match your own mobile app users to ACS users.
4. Assign the user identity to an [access group](../user-management/assigning-users-to-access-groups).
   * Access groups are preconfigured to grant access to specific entrances.\
     While some access control systems use access groups, others specify allowed entrances directly within the credential. For more details, see [Access Permission Assignment Variations](../connect-an-acs-to-seam/understanding-access-control-system-differences#access-permission-assignment-variations).
5. Create a mobile key [ACS credential](../managing-credentials) for the user identity.
6. View the list of entrances to which the user now has access.

:rocket: Let's get started!

***

## Step 1: Connect a Virtual ACS

In this quick start, use Seam Console to connect a virtual ACS to your sandbox workspace. Alternately, you can use the Seam API to create a [Connect Webview](/core-concepts/connect-webviews/index) and then use it to connect an ACS to Seam.

1. Log in to [Seam Console](https://console.seam.co/).

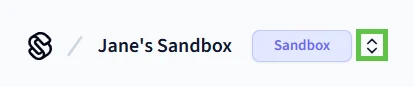
2. In the upper-left corner, click the workspace switcher and select or [create a sandbox workspace](/core-concepts/workspaces/index#create-a-sandbox-workspace).

   <img src="https://mintcdn.com/seam-feat-mintlify-migration-iteration/N2WzR-0uAm5pfjdF/images/workspace-switcher.png?fit=max&auto=format&n=N2WzR-0uAm5pfjdF&q=85&s=69cb6faacd1569a5f973aab02ed7d260" alt="Use the Seam Console workspace switcher to switch between workspaces and create new workspaces." width="414" height="87" data-path="images/workspace-switcher.png" />

3. In the top navigation pane, click **ACS Systems**.

   <figure>
     <img src="https://mintcdn.com/seam-feat-mintlify-migration-iteration/ttptfiJo49nVq_Qy/images/acs-quick-start-access-systems-tab.png?fit=max&auto=format&n=ttptfiJo49nVq_Qy&q=85&s=608e894c2203422d509511fba2d39666" alt="Click ACS Systems to go to the Access Systems page." width="1920" height="287" data-path="images/acs-quick-start-access-systems-tab.png" />

     <figcaption>
       <p>Click ACS Systems to go to the Access Systems page.</p>
     </figcaption>
   </figure>

4. On the **Access Systems** page, click **New Access System**.

   Seam Console displays a Connect Webview that enables you to connect a virtual ACS to Seam.

5. In the Connect Webview, authorize the connection.

   1. Click **Continue**.
   2. In the device brand list, click **Salto KS**.
   3. On the Salto KS authorization page:
      1. In the **Email** field, type `jane@example.com`.
      2. In the **Password** field, type `1234`.
      3. Click **Log In**.
      4. When prompted to allow application access, click **Yes, Allow**.
      5. In the sites list, select **Main Site** and then click **Continue**.
      6. When prompted to allow Seam to add a user to the virtual Salto KS Site, click **Allow and Continue**.
      7. Click **Close**.

   The **Access Systems** page now displays the newly-connected virtual Salto KS access control system.

***

## Step 2: Install a Seam SDK and Create an API Key

1. Download and install a Seam SDK in your favorite programming language.

<Tabs>
  <Tab title="JavaScript">
    ```bash theme={null}
    npm i seam
    ```
  </Tab>

  <Tab title="Python">
    ```bash theme={null}
    pip install seam
    # For some development environments, use pip3 in this command instead of pip.
    ```
  </Tab>

  <Tab title="Ruby">
    ```bash theme={null}
    bundle add seam
    ```
  </Tab>

  <Tab title="PHP">
    ```bash theme={null}
    composer require seamapi/seam
    ```
  </Tab>

  <Tab title="C#">
    Install using [nuget](https://www.nuget.org/packages/Seam).
  </Tab>
</Tabs>

2. Create an API key.
   1. In the top navigation pane of [Seam Console](https://console.seam.co/), click **Developer**.
   2. In the left navigation pane, click **API Keys**.
   3. In the upper-right corner of the **API Keys** page, click **Add API Key**.
   4. In the **Add API Key** dialog, type a name for your new API key and then click **Create API Key**.
   5. Copy the newly-created API key and store it for future use.
3. Open a terminal window and export your API key as an environment variable.

   ```sh theme={null}
   export SEAM_API_KEY=seam_test2bMS_94SrGUXuNR2JmJkjtvBQDg5c
   ```

   The Seam SDK that you have installed automatically uses this API key once you have exported it.

***

## Step 3: Create a User Identity

Create a user identity to represent a mobile app user.

1. Find the ACS system ID.
   1. In the top navigation pane of [Seam Console](https://console.seam.co/), click **ACS Systems**.
   2. On the **Access Systems** page, locate the Salto KS Main Site ACS.
   3. In the **acs\_system\_id** column for the Main Site ACS, click the ID to copy it.
   4. Store this ACS system ID for future use.
2. Create the user identity, as follows:

<Tabs>
  <Tab title="JavaScript">
    **Code:**

    ```javascript theme={null}
    import { Seam } from 'seam'

    const seam = new Seam() // Seam automatically uses your exported SEAM_API_KEY.

    const jenDoeUser = await seam.userIdentities.create({
      full_name: 'Jen Doe',
      email_address: 'jen.doe@example.com',
      // Use the ACS system ID that you copied earlier from Seam Console.
      acs_system_id: acsSystemId,
    })
    ```

    **Output:**

    ```json theme={null}
    {
      "user_identity_id": "22222222-2222-2222-2222-222222222222",
      "full_name": "Jen Doe",
      "email_address": "jen.doe@example.com",
      ...
    }
    ```
  </Tab>

  <Tab title="cURL">
    **Code:**

    ```bash theme={null}
    # Use the ACS system ID that you copied earlier from Seam Console.
    jen_doe_user=$(curl -X 'POST' \
      'https://connect.getseam.com/user_identities/create' \
      -H 'accept: application/json' \
      -H "Authorization: Bearer ${SEAM_API_KEY}" \
      -H 'Content-Type: application/json' \
      -d "{
      \"full_name\": \"Jen Doe\",
      \"email_address\": \"jen.doe@example.com\",
      \"acs_system_id\": \"${acs_system_id}\",
    }")
    ```

    **Output:**

    ```json theme={null}
    {
      "user_identity": {
        "user_identity_id": "22222222-2222-2222-2222-222222222222",
        "full_name": "Jen Doe",
        "email_address": "jen.doe@example.com",
        ...
      },
      "ok": true
    }
    ```
  </Tab>

  <Tab title="Python">
    **Code:**

    ```python theme={null}
    from seam import Seam

    seam = Seam()  # Seam automatically uses your exported SEAM_API_KEY.

    jen_doe_user = seam.user_identities.create(
      full_name="Jen Doe",
      email_address="jen.doe@example.com",
      # Use the ACS system ID that you copied earlier from Seam Console.
      acs_system_ids=[acs_system_id]
    )
    ```

    **Output:**

    ```
    UserIdentity(
      user_identity_id='22222222-2222-2222-2222-222222222222',
      full_name='Jen Doe',
      email_address='jen.doe@example.com',
      ...
    )
    ```
  </Tab>

  <Tab title="Ruby">
    **Code:**

    ```ruby theme={null}
    require "seam"

    seam = Seam.new() # Seam automatically uses your exported SEAM_API_KEY.

    jen_doe_user = seam.user_identities.create(
      full_name: "Jen Doe",
      email_address: "jen.doe@example.com",
      # Use the ACS system ID that you copied earlier from Seam Console.
      acs_system_id: acs_system_id,
    )
    ```

    **Output:**

    ```
    <Seam::Resources::UserIdentity:0x005f0
      user_identity_id="22222222-2222-2222-2222-222222222222"
      full_name="Jen Doe"
      email_address="jen.doe@example.com"
      ...
    >
    ```
  </Tab>

  <Tab title="PHP">
    **Code:**

    ```php theme={null}
    <?php
    require 'vendor/autoload.php';

    $seam = new Seam\SeamClient(); // Seam automatically uses your exported SEAM_API_KEY.

    $jen_doe_user = $seam->user_identities->create(
      full_name: "Jen Doe",
      email_address: "jen.doe@example.com",
      // Use the ACS system ID that you copied earlier from Seam Console.
      acs_system_id: $acs_system_id,
    );
    ```

    **Output:**

    ```json theme={null}
    {
      "user_identity_id": "22222222-2222-2222-2222-222222222222",
      "full_name": "Jen Doe",
      "email_address": "jen.doe@example.com",
      ...
    }
    ```
  </Tab>

  <Tab title="C#">
    **Code:**

    ```csharp theme={null}
    // Coming soon!
    ```

    **Output:**

    ```json theme={null}
    // Coming soon!
    ```
  </Tab>
</Tabs>

***

## Step 4: Assign the User Identity to an Access Group

Add the user identity to an access group. For Salto KS, access groups specify the entrances to which users have access.

Some other access control systems do not use access groups and, instead, specify allowed entrances directly within the credential. For more details, see [Access Permission Assignment Variations](../connect-an-acs-to-seam/understanding-access-control-system-differences#access-permission-assignment-variations).

1. Find the access group ID.
   1. In the top navigation pane of [Seam Console](https://console.seam.co/), click **ACS Systems**.
   2. On the **Access Systems** page, click the Salto KS Main Site ACS.
   3. On the **Main Site** page, click the **Access Groups** tab.
   4. Locate the Main Group, click **...**, and click **Copy Id**.
   5. Store this access group ID for future use.
2. Assign the user identity to the Main Group, as follows:

<Tabs>
  <Tab title="JavaScript">
    **Code:**

    ```javascript theme={null}
    await seam.acs.accessGroups.addUser({
      // Use the access group ID that you copied earlier from Seam Console.
      acs_access_group_id: accessGroupId,
      user_identity_id: jenDoeUser.user_identity_id,
    })
    ```

    **Output:**

    ```json theme={null}
    void
    ```
  </Tab>

  <Tab title="cURL">
    **Code:**

    ```bash theme={null}
    # Use the access group ID that you copied earlier from Seam Console.
    curl -X 'POST' \
      'https://connect.getseam.com/acs/access_groups/add_user' \
      -H "Authorization: Bearer ${SEAM_API_KEY}" \
      -H 'Content-Type: application/json' \
      -d "{
      \"acs_access_group_id\": \"${access_group_id}\",
      \"user_identity_id\": \"$(jq -r '.user_identity.user_identity_id' <<< ${jen_doe_user})\"
    }"
    ```

    **Output:**

    ```json theme={null}
    {
      "ok": true
    }
    ```
  </Tab>

  <Tab title="Python">
    **Code:**

    ```python theme={null}
    seam.acs.access_groups.add_user(
      # Use the access group ID that you copied earlier from Seam Console.
      acs_access_group_id = access_group_id,
      user_identity_id = jen_doe_user.user_identity_id
    )
    ```

    **Output:**

    ```
    None
    ```
  </Tab>

  <Tab title="Ruby">
    **Code:**

    ```ruby theme={null}
    seam.acs.access_groups.add_user(
      # Use the access group ID that you copied earlier from Seam Console.
      acs_access_group_id: access_group_id,
      user_identity_id: jen_doe_user.user_identity_id
    )
    ```

    **Output:**

    ```
    nil
    ```
  </Tab>

  <Tab title="PHP">
    **Code:**

    ```php theme={null}
    $seam->acs->access_groups->add_user(
      // Use the access group ID that you copied earlier from Seam Console.
      acs_access_group_id: $access_group_id,
      user_identity_id: jen_doe_user.user_identity_id
    );
    ```

    **Output:**

    ```
    void
    ```
  </Tab>

  <Tab title="C#">
    **Code:**

    ```csharp theme={null}
    // Coming soon!
    ```

    **Output:**

    ```
    // Coming soon!
    ```
  </Tab>
</Tabs>

***

## Step 5: Create a Mobile Key Credential

Create a mobile key credential for the user identity.

<Tabs>
  <Tab title="JavaScript">
    **Code:**

    ```javascript theme={null}
    const mobileKey = await seam.acs.credentials.create({
      user_identity_id: jenDoeUser.user_identity_id,
      is_multi_phone_sync_credential: true,
      access_method: 'mobile_key',
    })
    ```

    **Output:**

    ```json theme={null}
    {
      acs_credential_id: '66666666-6666-6666-6666-666666666666',
      acs_system_id: '11111111-1111-1111-1111-111111111111',
      user_identity_id: '22222222-2222-2222-2222-222222222222',
      access_method: 'mobile_key',
      ...
    }
    ```
  </Tab>

  <Tab title="cURL">
    **Code:**

    ```bash theme={null}
    mobile_key=$(curl -X 'POST' \
      'https://connect.getseam.com/acs/credentials/create' \
      -H 'accept: application/json' \
      -H "Authorization: Bearer ${SEAM_API_KEY}" \
      -H 'Content-Type: application/json' \
      -d "{
      \"user_identity_id\": \"$(jq -r '.user_identity.user_identity_id' <<< ${jen_doe_user})\",
      \"is_multi_phone_sync_credential\": true,
      \"access_method\": \"mobile_key\"
    }")
    ```

    **Output:**

    ```json theme={null}
    {
      "acs_credential":{
        "acs_credential_id": "66666666-6666-6666-6666-666666666666",
        "acs_system_id": "11111111-1111-1111-1111-111111111111",
        "user_identity_id": "22222222-2222-2222-2222-222222222222",
        "access_method": "mobile_key",
        ...
      }
    }
    ```
  </Tab>

  <Tab title="Python">
    **Code:**

    ```python theme={null}
    mobile_key = seam.acs.credentials.create(
      user_identity_id = jen_doe_user.user_identity_id,
      is_multi_phone_sync_credential = True,
      access_method = "mobile_key"
    )
    ```

    **Output:**

    ```
    AcsCredential(
      acs_credential_id='66666666-6666-6666-6666-666666666666',
      acs_system_id='11111111-1111-1111-1111-111111111111',
      user_identity_id='22222222-2222-2222-2222-222222222222',
      access_method='mobile_key',
      ...
    )
    ```
  </Tab>

  <Tab title="Ruby">
    **Code:**

    ```ruby theme={null}
    mobile_key = seam.acs.credentials.create(
      user_identity_id: jen_doe_user.user_identity_id,
      is_multi_phone_sync_credential: true,
      access_method: "mobile_key"
    )
    ```

    **Output:**

    ```
    <Seam::Resources::AcsCredential:0x005f0
      acs_credential_id="66666666-6666-6666-6666-666666666666"
      acs_system_id="11111111-1111-1111-1111-111111111111"
      user_identity_id= "22222222-2222-2222-2222-222222222222"
      access_method="mobile_key"
      ...
    >
    ```
  </Tab>

  <Tab title="PHP">
    **Code:**

    ```php theme={null}
    $pin_code_credential = $seam->acs->credentials->create(
      user_identity_id: $jen_doe_user->user_identity_id,
      is_multi_phone_sync_credential: true,
      access_method: "mobile_key"
    );
    ```

    **Output:**

    ```json theme={null}
    {
      "acs_credential_id": "66666666-6666-6666-6666-666666666666",
      "acs_system_id": "11111111-1111-1111-1111-111111111111",
      "user_identity_id": "22222222-2222-2222-2222-222222222222",
      "access_method": "mobile_key",
      ...
    }
    ```
  </Tab>

  <Tab title="C#">
    **Code:**

    ```csharp theme={null}
    // Coming soon!
    ```

    **Output:**

    ```json theme={null}
    // Coming soon!
    ```
  </Tab>
</Tabs>

***

## Step 6: View Your New Credential

You can use Seam Console, the Seam API, or the [Seam CLI](../../../core-concepts/seam-console/seam-online-cli) to view the list of entrances to which the ACS user now has access.

To use Seam Console to view information about your new PIN code credential:

1. In the top navigation pane of [Seam Console](https://console.seam.co/), click **ACS Systems**.

2. On the **Access Systems** page, click the Salto KS Main Site ACS.

3. In the **Users** table, click **Jen Doe**, the ACS user that you created.

   <figure>
     <img src="https://mintcdn.com/seam-feat-mintlify-migration-iteration/vBZrgRoLNEvFJtz0/images/mobile-key-quick-start-user.png?fit=max&auto=format&n=vBZrgRoLNEvFJtz0&q=85&s=4d4e4855e5b6bba65e6bc2c46eeba242" alt="Click the ACS user to view their credentials." width="1188" height="270" data-path="images/mobile-key-quick-start-user.png" />

     <figcaption>
       <p>Click the ACS user to view their credentials.</p>
     </figcaption>
   </figure>

4. In the **Credentials** tab for the ACS user, note the mobile key credential (multi-phone sync credential) that you created.

5. Click the **Access Groups** tab for the ACS user.

6. Click the **Main Group** access group.

7. On the **Main Group** page click the **Entrances** tab and then view the entrances to which this access group grants the ACS user access.

   <figure>
     <img src="https://mintcdn.com/seam-feat-mintlify-migration-iteration/vBZrgRoLNEvFJtz0/images/pin-code-quick-start-access-group-entrances.png?fit=max&auto=format&n=vBZrgRoLNEvFJtz0&q=85&s=7abf02a3b393ec3d4aca02031b2ae201" alt="View the entrances to which the ACS user has access as a member of the access group." width="1550" height="419" data-path="images/pin-code-quick-start-access-group-entrances.png" />

     <figcaption>
       <p>
         View the entrances to which the ACS user has access as a member of the
         access group.
       </p>
     </figcaption>
   </figure>

<Info>
  This quick start shows the server-side portion of the mobile access
  development process. The other piece of this process is to develop a mobile
  app that downloads the user's mobile keys and then uses BLE or similar
  technology to unlock nearby entrances to which the user's credentials grant
  access. For details, see [Integrating into your mobile
  application](/capability-guides/mobile-access/mobile-device-sdks/index).
</Info>

***

## Next Steps

Now that you've created a mobile key credential, try out the other ACS quick starts.

* [PIN Code Quick Start](/low-level-apis/access-systems/acs-quick-starts/pin-code-quick-start)
* [Key Card Quick Start](/low-level-apis/access-systems/acs-quick-starts/encodable-key-card-quick-start)

Then, [connect your ACS to Seam](/low-level-apis/access-systems/connect-an-acs-to-seam/index).

***

## Learn More

For a deeper dive into ACS concepts and instructions, see the following topics:

1. Learn about ACS concepts.
   * [Access Control System Resources](../connect-an-acs-to-seam/access-control-system-resources)
   * [Understanding ACS Differences](../connect-an-acs-to-seam/understanding-access-control-system-differences)
2. Create user identities.
   * [Managing Mobile App User Accounts with User Identities](/capability-guides/mobile-access/managing-mobile-app-user-accounts-with-user-identities)
3. For relevant access control systems, assign user identities to access groups.
   * [Adding User Identities to Access Groups](/api/acs/access_groups/add_user)
4. Learn about available entrances.
   * [Retrieving Entrance Details](../retrieving-entrance-details)
5. Create credentials for ACS users.
   * [Managing Credentials](../managing-credentials)
6. Learn more about the Seam mobile access solution.
   * [Mobile Access](/capability-guides/mobile-access/index)
   * [Integrating into your mobile application](/capability-guides/mobile-access/mobile-device-sdks/index)
7. See the Seam [Access Control Systems API reference](/api/acs/object).